Getting Started
Your first steps in Pixwel — navigating the platform, reading asset symbols, building contact lists, and when the production team is available.
Your first steps in Pixwel — navigating the platform, reading asset symbols, building contact lists, and when the production team is available.
New to Pixwel? This guide covers the basics: finding your way around, understanding the symbols on assets, setting up contact lists, and knowing when help is available.
A few features make moving through the platform fast:

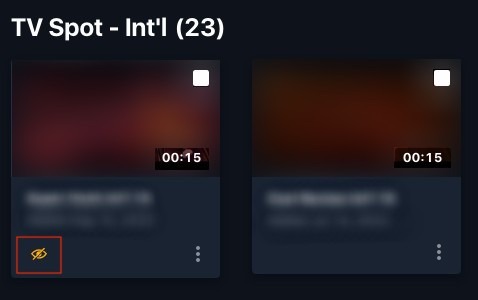
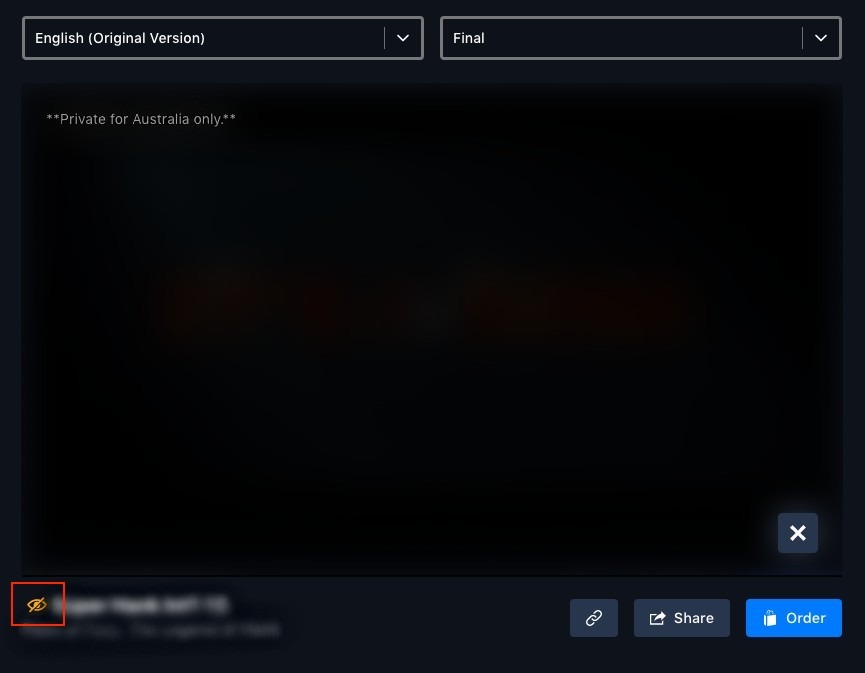
Two icons can appear next to an asset to flag restricted access:
| Symbol | Meaning |
|---|---|
| Lock | The file is embargoed — access is restricted until a release date. See Downloads for how to tell when, and how to request access. |
| Yellow slashed eye | The asset is private and locked to specific territories. Only Head Office, the localization vendor, and the assigned territories can see it. |
A private asset shows the slashed-eye icon beneath its thumbnail in project view, and to the left of its name in asset view. Hover the note overlay on the asset to see which territories it’s restricted to.

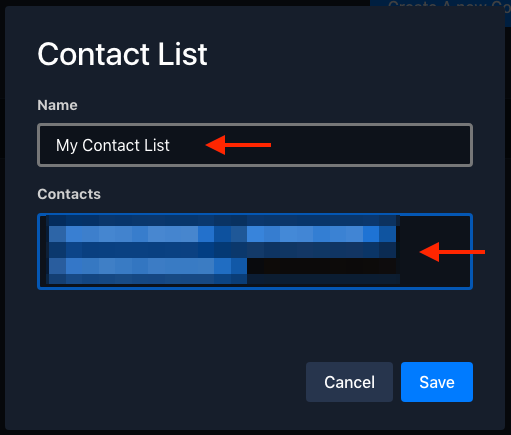
A contact list is a reusable group of recipients you can pull into a share instead of typing addresses each time.
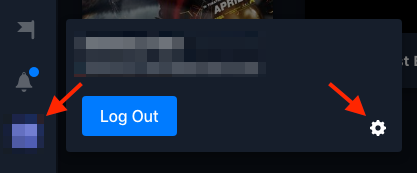
Click your user profile at the bottom-left, then the settings gear (⚙️) to open Preferences.
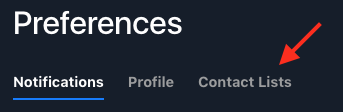
Select the Contact Lists tab.
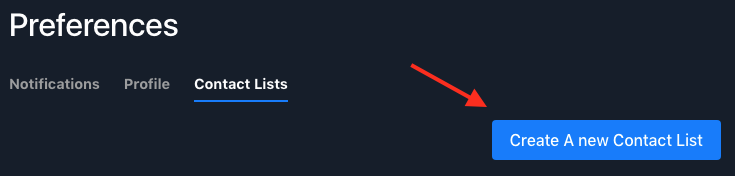
Click Create a New Contact List, enter a name and the contacts, and click Save.
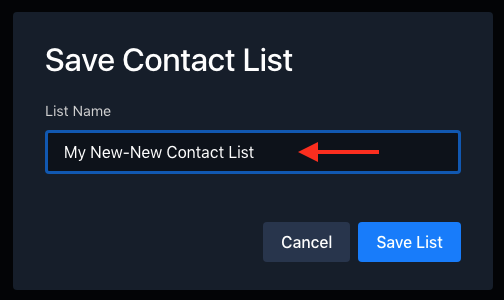
You can edit or delete a list later from the same Contact Lists tab. You can also create a list on the fly while sharing: in the Share Queue, add recipients, click the save icon (💾) beside the field, name the list, and save.


For when the team is available and how to reach them, see Support.